Archive
- March 2024 (1)
- February 2024 (2)
- January 2024 (1)
- November 2023 (1)
- July 2023 (1)
- May 2023 (1)
- February 2023 (1)
- April 2021 (2)
- February 2021 (2)
- January 2021 (6)
- October 2020 (4)
- September 2020 (3)
- August 2020 (6)
- July 2020 (5)
- June 2020 (4)
- May 2020 (6)
- April 2020 (7)
- March 2020 (5)
- February 2020 (5)
- January 2020 (5)
- December 2019 (5)
- November 2019 (6)
- October 2019 (5)
- September 2019 (1)
- March 2018 (10)
- February 2018 (7)
- January 2018 (10)
- December 2017 (7)
- November 2017 (7)
- October 2017 (10)
- September 2017 (8)
- August 2017 (10)
- July 2017 (8)
- June 2017 (9)
- May 2017 (13)
- April 2017 (10)
- March 2017 (10)
- February 2017 (10)
- January 2017 (11)
- December 2016 (12)
- November 2016 (16)
- October 2016 (15)
- September 2016 (5)
- August 2016 (17)
- July 2016 (15)
- June 2016 (16)
- May 2016 (19)
- April 2016 (12)
- March 2016 (20)
- February 2016 (17)
- January 2016 (21)
- December 2015 (20)
- November 2015 (7)
- October 2015 (1)
- September 2015 (1)
- July 2015 (7)
- June 2015 (2)
- May 2015 (1)
- April 2015 (1)
Close
Archive
- March 2024 (1)
- February 2024 (2)
- January 2024 (1)
- November 2023 (1)
- July 2023 (1)
- May 2023 (1)
- February 2023 (1)
- April 2021 (2)
- February 2021 (2)
- January 2021 (6)
- October 2020 (4)
- September 2020 (3)
- August 2020 (6)
- July 2020 (5)
- June 2020 (4)
- May 2020 (6)
- April 2020 (7)
- March 2020 (5)
- February 2020 (5)
- January 2020 (5)
- December 2019 (5)
- November 2019 (6)
- October 2019 (5)
- September 2019 (1)
- March 2018 (10)
- February 2018 (7)
- January 2018 (10)
- December 2017 (7)
- November 2017 (7)
- October 2017 (10)
- September 2017 (8)
- August 2017 (10)
- July 2017 (8)
- June 2017 (9)
- May 2017 (13)
- April 2017 (10)
- March 2017 (10)
- February 2017 (10)
- January 2017 (11)
- December 2016 (12)
- November 2016 (16)
- October 2016 (15)
- September 2016 (5)
- August 2016 (17)
- July 2016 (15)
- June 2016 (16)
- May 2016 (19)
- April 2016 (12)
- March 2016 (20)
- February 2016 (17)
- January 2016 (21)
- December 2015 (20)
- November 2015 (7)
- October 2015 (1)
- September 2015 (1)
- July 2015 (7)
- June 2015 (2)
- May 2015 (1)
- April 2015 (1)
Back to Blog List
Topics/Previous Posts
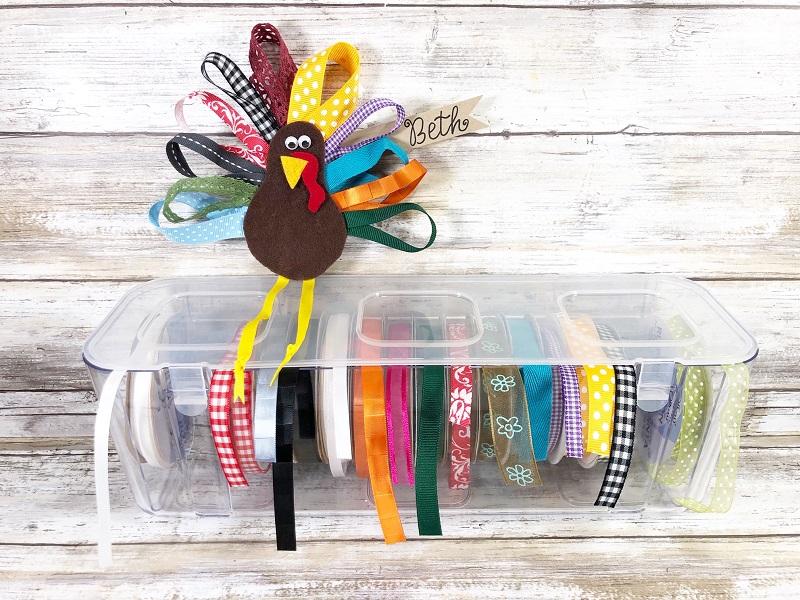


DIY Thanksgiving Ribbon Turkey Decoration
Add a little fun and whimsy this Thanksgiving with this Quick and Easy Ribbon Turkey Decoration.
Featured Storage: Deflecto Ribbon Dispenser and Deflecto Stackable Caddy Organizer
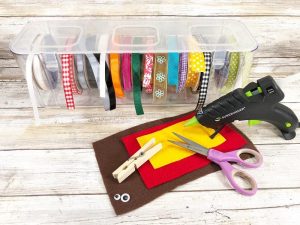
Materials Needed:
- Felt Pieces: Brown, Red, and Yellow
- Assorted Ribbon
- Googly Eyes
- Scissors
- Hot Glue Gun or Craft Glue
- Clothespin
- Cardstock
- Permanent Marker
- Ruler

Directions:
- Draw a simple turkey body, beak, and wobbler on the cardstock to create a pattern.
- Or, you can download, print, and cut Design Team Member Beth Watson’s turkey pattern here.
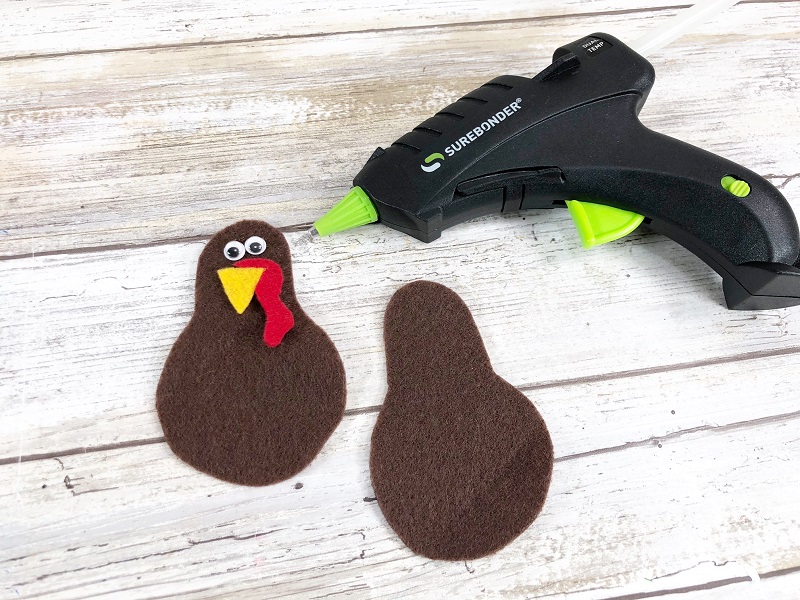
- Trace pattern pieces onto the felt and cut out. (Cut two turkey bodies)
- Glue googly eyes, beak, and wobbler onto the turkey body.
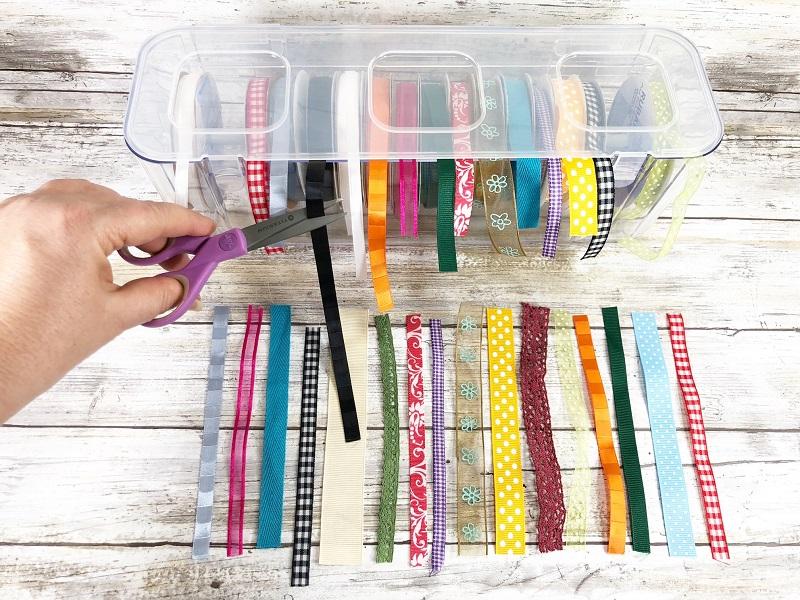
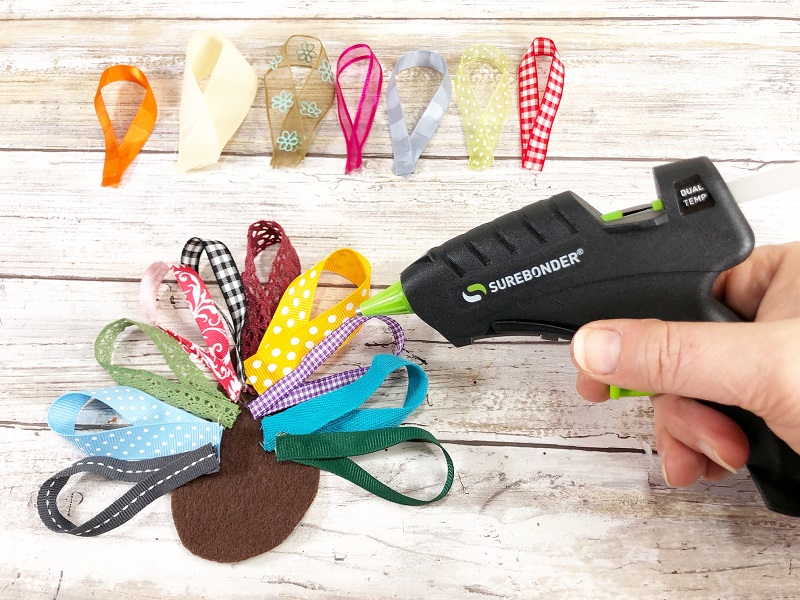
- Measure and cut six-inch lengths of rainbow-colored ribbon from your craft stash. Fold each piece of ribbon into a loop and secure at the ends with a glue gun and glue sticks. For each turkey, you will need 10-12 loops of ribbon.
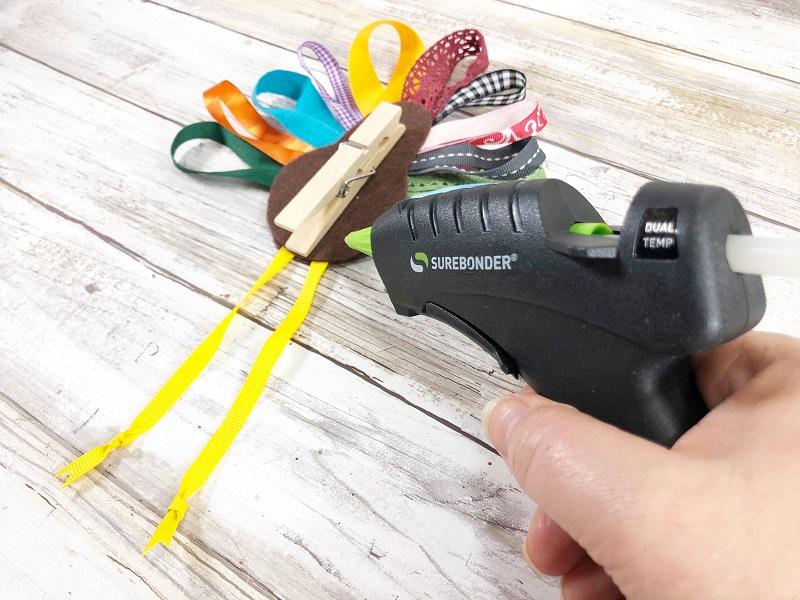
- Line up the loops in the color pattern that you prefer. Attach each rainbow ribbon loop to the back piece of the turkey body with a glue gun and glue sticks. Measure and cut two lengths of yellow ribbon six inches long, tie a not near one end, and then cut out a triangle notch to resemble the turkey legs. Glue to the bottom of the body of the turkey.
- Glue the front piece of the turkey onto the back, which will cover all of the ribbon ends. Attach a wooden spring-style clothespin to the back center of the turkey with a glue gun with the clip end pointing up.
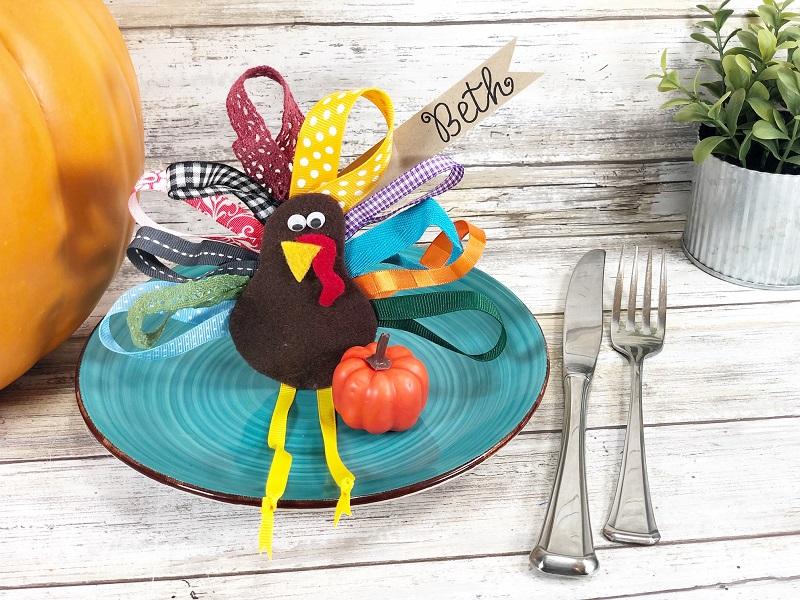
Ribbon Turkey Decorations make Great Place Cards for your Thanksgiving Table.
Cut a strip of cardstock 3/4″ in width, hand letter your name onto the strip with a Permanent Marker, and then clip into the clothespin. The wooden clothespin acts as a stand for the turkey to sit and a clip to hold the names as place cards.
The Ribbon Turkey Decoration was designed by Beth Watson.
For more great projects visit Beth’s blog here.
Share your projects and ideas using #DeflectoAtHome #DeflectoCrafts